How I Built a Backyard High‑Tech Mancave (for My Dad)
This project was a special one — I built a backyard mancave as a retirement gift for my dad. He’s not super tech‑savvy, so my goal was simple: make everything easy to use, reliable day‑to‑day, and “set it and forget it.”
In this post, I’ll break down the two upgrades that made the biggest difference: (1) getting solid internet to the backyard without running Ethernet, and (2) adding RGBIC lighting tucked into crown molding for that clean, modern glow.
Affiliate note: This post contains affiliate links. If you buy through them, I may earn a small commission at no extra cost to you.
Part 1: Getting Internet to a Backyard Mancave (Without Running Ethernet)
A backyard mancave is only “high‑tech” if the connection is solid. But running Ethernet outdoors can be a bigger job than most people want (trenches, conduit, weatherproofing, drilling, and sometimes permits).
For this build, I used a simple and surprisingly effective solution: a powerline adapter. Powerline networking uses your home’s electrical wiring to carry a network signal — meaning you can often get a wired‑style connection using outlets you already have.
Product I used:
Why Powerline Was the Right Fit for This Backyard Build
- No trenching or long outdoor cable runs — a huge time saver.
- More stable than “stretching” Wi‑Fi to the far end of the yard.
- Quick setup: plug it in, pair it, and you’re online.
- Great for smart TVs/streamers that benefit from a reliable connection.
Step‑by‑Step: How to Set Up Powerline Internet to a Backyard Space
- Plug Adapter #1 in near your router
Use a wall outlet if possible. Then connect it to your router using an Ethernet cable. - Plug Adapter #2 in inside the backyard mancave
This adapter becomes your network connection in the backyard. - Pair the adapters
Most kits have a “Pair” button. Press it on the first adapter, then the second. They should link within a minute or two. - Connect your gear
Plug a smart TV, streaming box, computer, or game console directly into the backyard adapter via Ethernet. - Run a quick speed test
Confirm you’re getting stable performance for streaming, calls, and smart devices.
Pro tip: If you also want strong Wi‑Fi in the backyard, plug a small Wi‑Fi router or access point into the powerline adapter. That creates a solid “local” Wi‑Fi network in the mancave while the backhaul runs over powerline.
Common Powerline Pitfalls (and Easy Fixes)
- Avoid surge protectors/power bars when you can — they can reduce performance.
- Try a different outlet if speed is inconsistent; some circuits are “noisier” than others.
- Big appliances can add interference (older fridges, treadmills, tools). If you notice dips, relocate the adapter.
- Wire the important devices (TV/streamer) for maximum stability and use Wi‑Fi for phones/tablets.
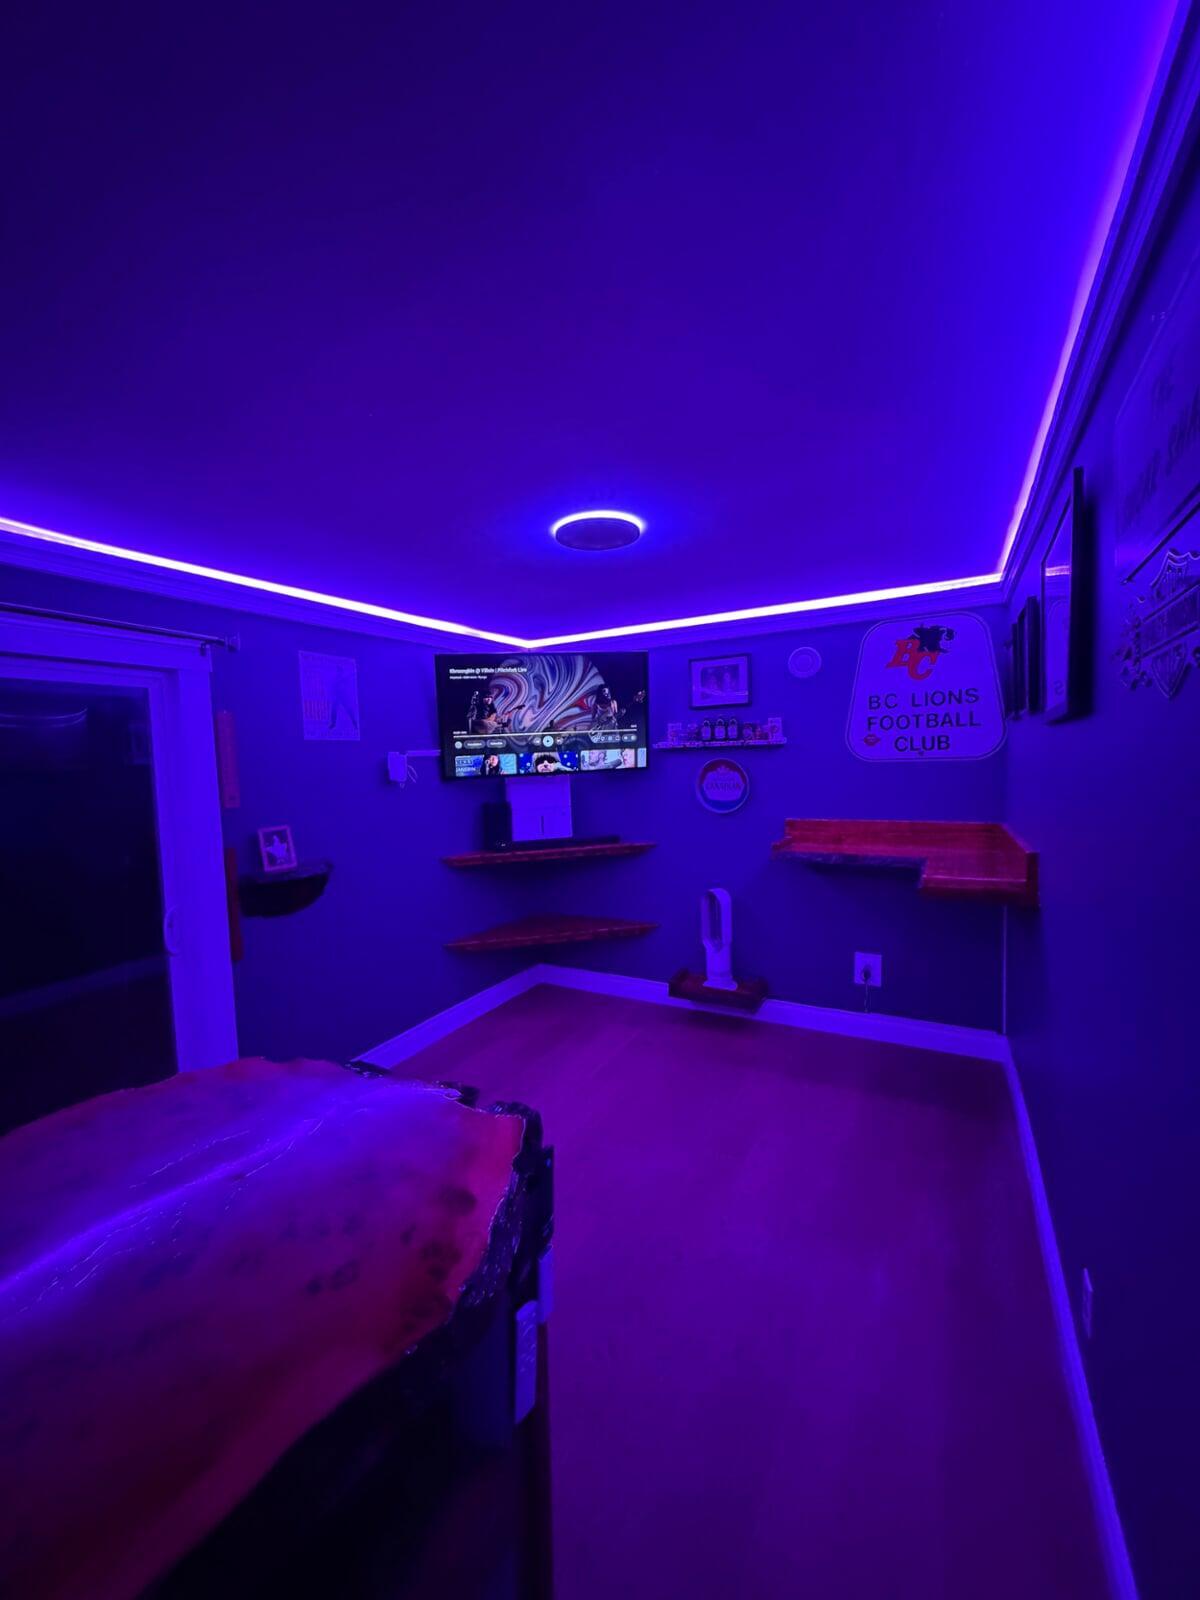
Part 2: RGBIC Lighting Hidden in Crown Molding (The “Wow” Upgrade)
Once internet was solved, I wanted the space to feel modern and fun — but still clean and polished. The best upgrade for that? RGBIC LED strip lighting tucked into crown molding.
RGBIC is a game‑changer because it allows multiple colors on the strip at the same time. That means gradients, animated effects, and scenes that look way more premium than a single‑color strip.
Product I used:
What You’ll Need
- RGBIC LED strip lights (link above)
- Crown molding/trim that creates a ledge to hide the strip
- Measuring tape + pencil
- Optional: mounting clips or extra 3M tape for corners and long runs
- Power access near where the controller/power supply will live
Step‑by‑Step: Installing RGBIC LEDs in Crown Molding
- Plan your run
Measure the walls and decide where the power/controller will sit so it’s hidden but still accessible. - Build a clean “light shelf” with crown molding
The goal is to hide the LED strip while aiming light upward/outward so it bounces and creates a soft glow. - Prep the surface
Wipe down the mounting area. Dust and sawdust reduce how well adhesive backing sticks. - Install the strip slowly
Don’t peel the whole backing at once. Press a little at a time so it stays straight and secure. Use clips in corners if needed. - Test before you tidy everything
Plug it in, run a few colors/effects, and confirm everything works before you hide cables. - Set simple scenes
Create presets like “Movie Night,” “Game Time,” and “Relax.” One‑tap scenes make it easy for anyone to use.
Safety note: If you’re adding outlets or doing any hardwired electrical work, consider hiring a qualified electrician. For LED strips, keep power supplies ventilated and avoid pinching cables behind trim.
Why This Lighting Setup Works So Well in a Backyard Mancave
- It looks custom because the LEDs are hidden and the light is indirect.
- Instant atmosphere for movie nights, sports, and hanging out.
- Easy for non‑techy users: pick a preset and you’re done.
- It’s a big upgrade for relatively low effort compared to other renovations.
Final Thoughts: High‑Tech Doesn’t Have to Mean Complicated
The biggest win in this build wasn’t just making the space “smart” — it was making it simple. Reliable internet made everything work smoothly, and the RGBIC crown‑molding glow made the space feel finished and premium.
If you’re building your own backyard mancave, start with the foundation: connectivity. Then layer on the fun stuff like lighting and easy presets that make the space feel like a true escape.
Quick shopping list:
CTA: If you watched the video and want help choosing the right setup for your backyard space, drop a comment or send me a message — I’m happy to share what worked (and what I’d do differently next time).